With Maptive, you can display existing routes from a spreadsheet for deliveries, sales calls, or school transportation. This guide explains how to map those routes and edit them using route optimization tools.
How to Display All of Your Routes at Once on a Map
Step 1: Format Your Data
Your spreadsheet must include a header row. At minimum, it should contain:
- Address
- City
- State
- Zip or Postal Code
- Country
To map routes correctly:
- Add a column named “Route Name” (e.g., “Route #1”, “Tuesday AM Run”)
- Add a column for the visit order, like “Order” or “Route Order”
If you plan to define routes using Maptive’s tools later, leave these two columns blank.
Step 2: Create a Map
- Click “Create a New Map”
- Name the map
- Upload your spreadsheet
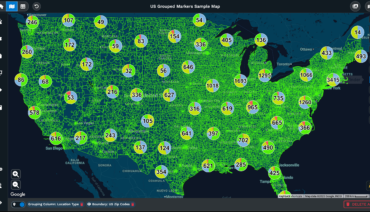
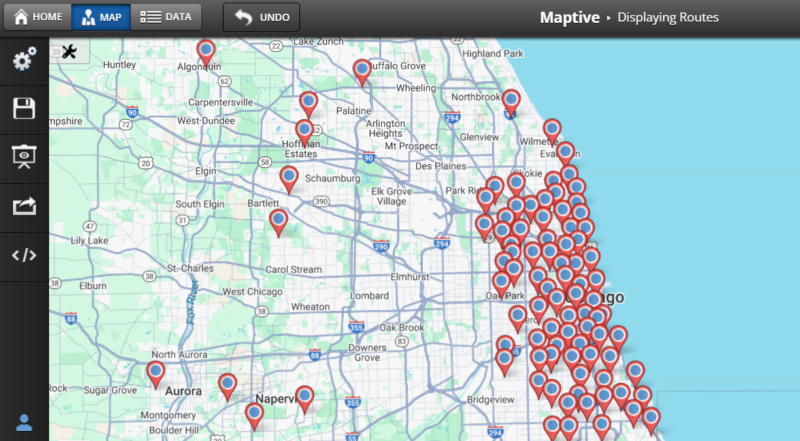
Your map will load with the default view.
Guide to Creating a New Map
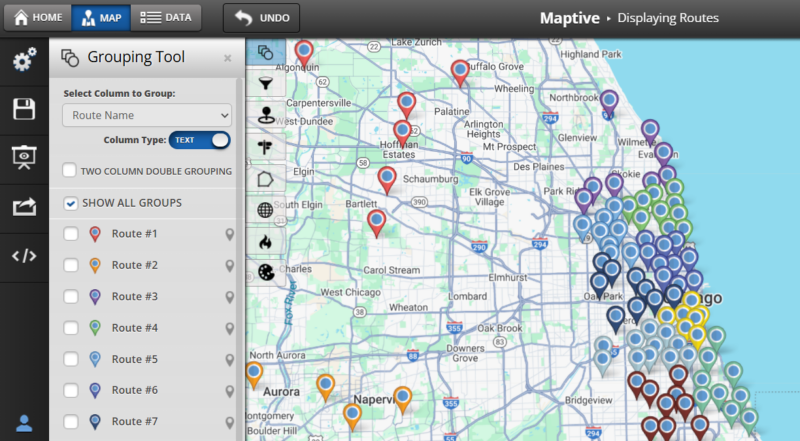
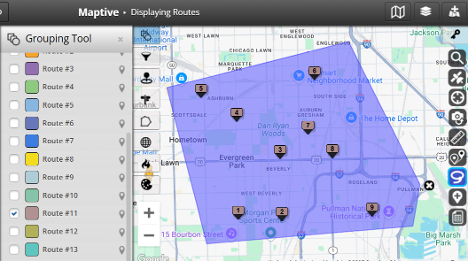
Step 3: Group by Route Name
- Open the Grouping tool
- Select the “Route Name” column
- Routes will be displayed in different colors
- Click the legend to filter which routes are shown
Grouping Tool Tutorial
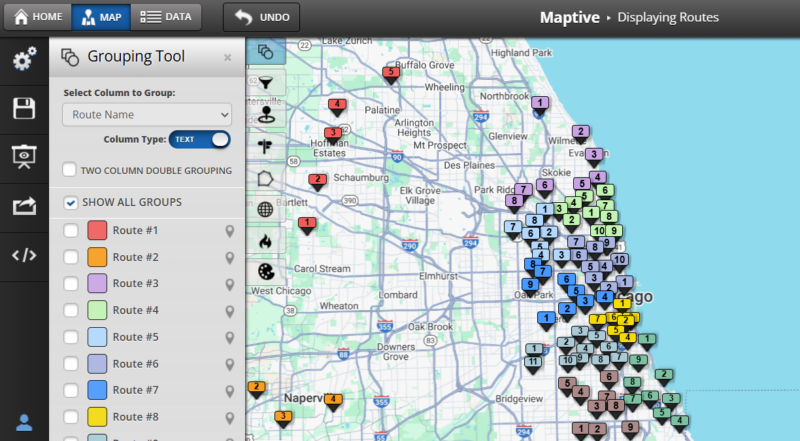
Step 4: Add Route Order to Markers
- Open “Map Settings”
- Go to “Map Markers / Graphics”
- Enable “Labels Inside Markers (from data)”
- Select your “Order” or “Route Order” column
If the data is missing or incorrect, you can fix it using the steps below.
 Sign up for a trial and try it with your data
Optimize Your Routes
Step 1: Select Markers to Route
Use one of two methods:
- Click markers individually and use “Add to Route”
- Use the lasso tool to select multiple markers
How to Use the Lasso Tool
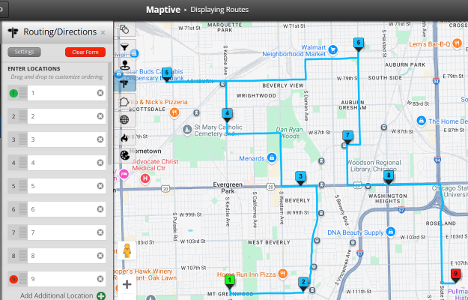
Step 2: Choose Routing Options
- Open the routing tool
- Markers will appear using their names (e.g., Order #)
- Set the first and last marker manually
- Use “Optimize Route” to reorder the rest
Note: The default first location is “Your Current Location.” You can replace it with an address or leave it.

Routing Tool Tutorial
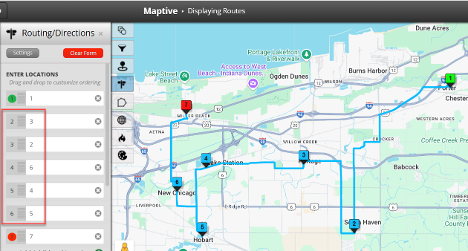
Step 3: Click “Optimize Directions”
This will reorder the route. If the order doesn’t change, your original sequence was already optimal.
Adjust Existing Routes or Create New Ones
If your data has incorrect or missing order information, you can fix it directly in the map.
Step 1: Click a Marker
- A popup will display the data
- If route order is in the name, it appears at the top
- Otherwise, it appears in the main popup body
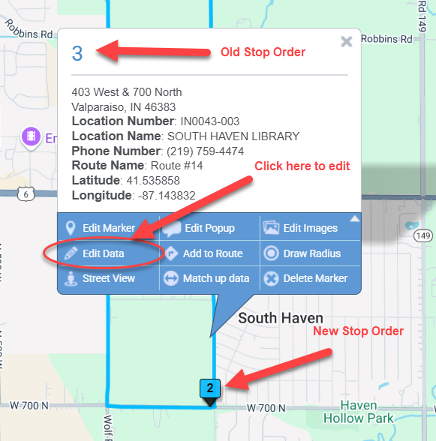
Step 2: Edit Data
- Click “Edit Data” in the popup
- Change the value in the “Order” column (e.g., 3 to 2)
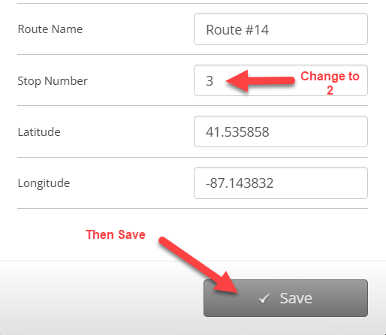
Step 3: Save and Repeat
Apply corrections for any other markers that are out of order.
Assign a New Route
If you want to assign or reassign markers to a new route:
Step 1: Lasso the Markers
Use the lasso tool to select all relevant markers.
Edit Markers Using the Lasso Tool
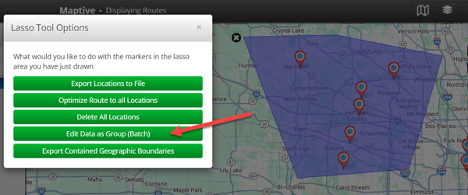
Step 2: Edit Data as a Group
- Click “Edit Data as Group”
- Only change the “Route Name” field
- Do not check boxes for other blank fields
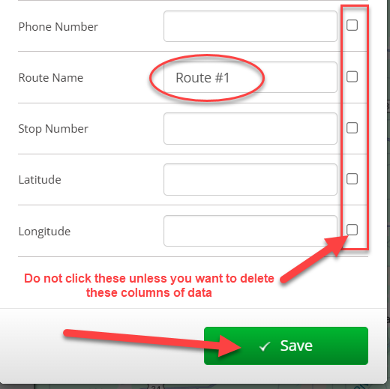
Step 3: Save
This applies the new route name to all selected markers. Use earlier steps to assign visit order if needed.
Sharing the Map
You have four options to share the map:
Option 1: Share with Team Members
- Requires a multi-user account
- Share full map access with logged-in Maptive users
Team Sharing Guide
Option 2: Share a Public Version
- Create a presentation version of the map
- Control tool access and visibility
- Options include: Public, Password-Protected, or Private
How to Share Maps
Option 3: Share a Specific View
- Save the current map view
- Filter by route or display directions
- Only viewable version includes turn-by-turn directions
Map Views Tutorial
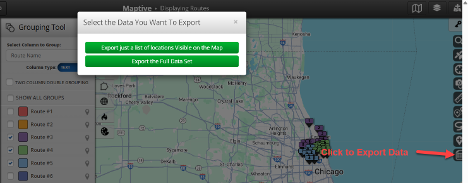
Option 4: Share the Spreadsheet
- Export the full dataset or filtered routes
- Send the file to any recipient
- Directions from the routing tool can also be exported
Conclusion
Mapping and managing routes in Maptive depends on clean data and knowing which tools to use. If your spreadsheet is well-structured, you can display, color, label, and optimize routes quickly. You can also fix errors, assign new routes, and control how maps are shared. Every step, from creating the map to exporting directions, follows a clear process. Stick to that, and the tool does the rest.
Sign up for a trial and try it with your data
Fred Metterhausen is a Chicago based computer programmer, and product owner of the current version of Maptive. He has over 15 years of experience developing mapping applications as a freelance developer, including 12 with Maptive. He has seen how thousands of companies have used mapping to optimize various aspects of their workflow.