Turn-by-Turn Directions
Open a marker in Maptive on your phone and tap Open in Google Navigate to launch live turn-by-turn driving directions, or email a directions link to a driver from the desktop.
Turn-by-Turn Directions to a Phone
Open in Google Navigate: the marker popup on a phone has a button that launches full turn-by-turn driving directions in the Google app already loaded on the driver phone
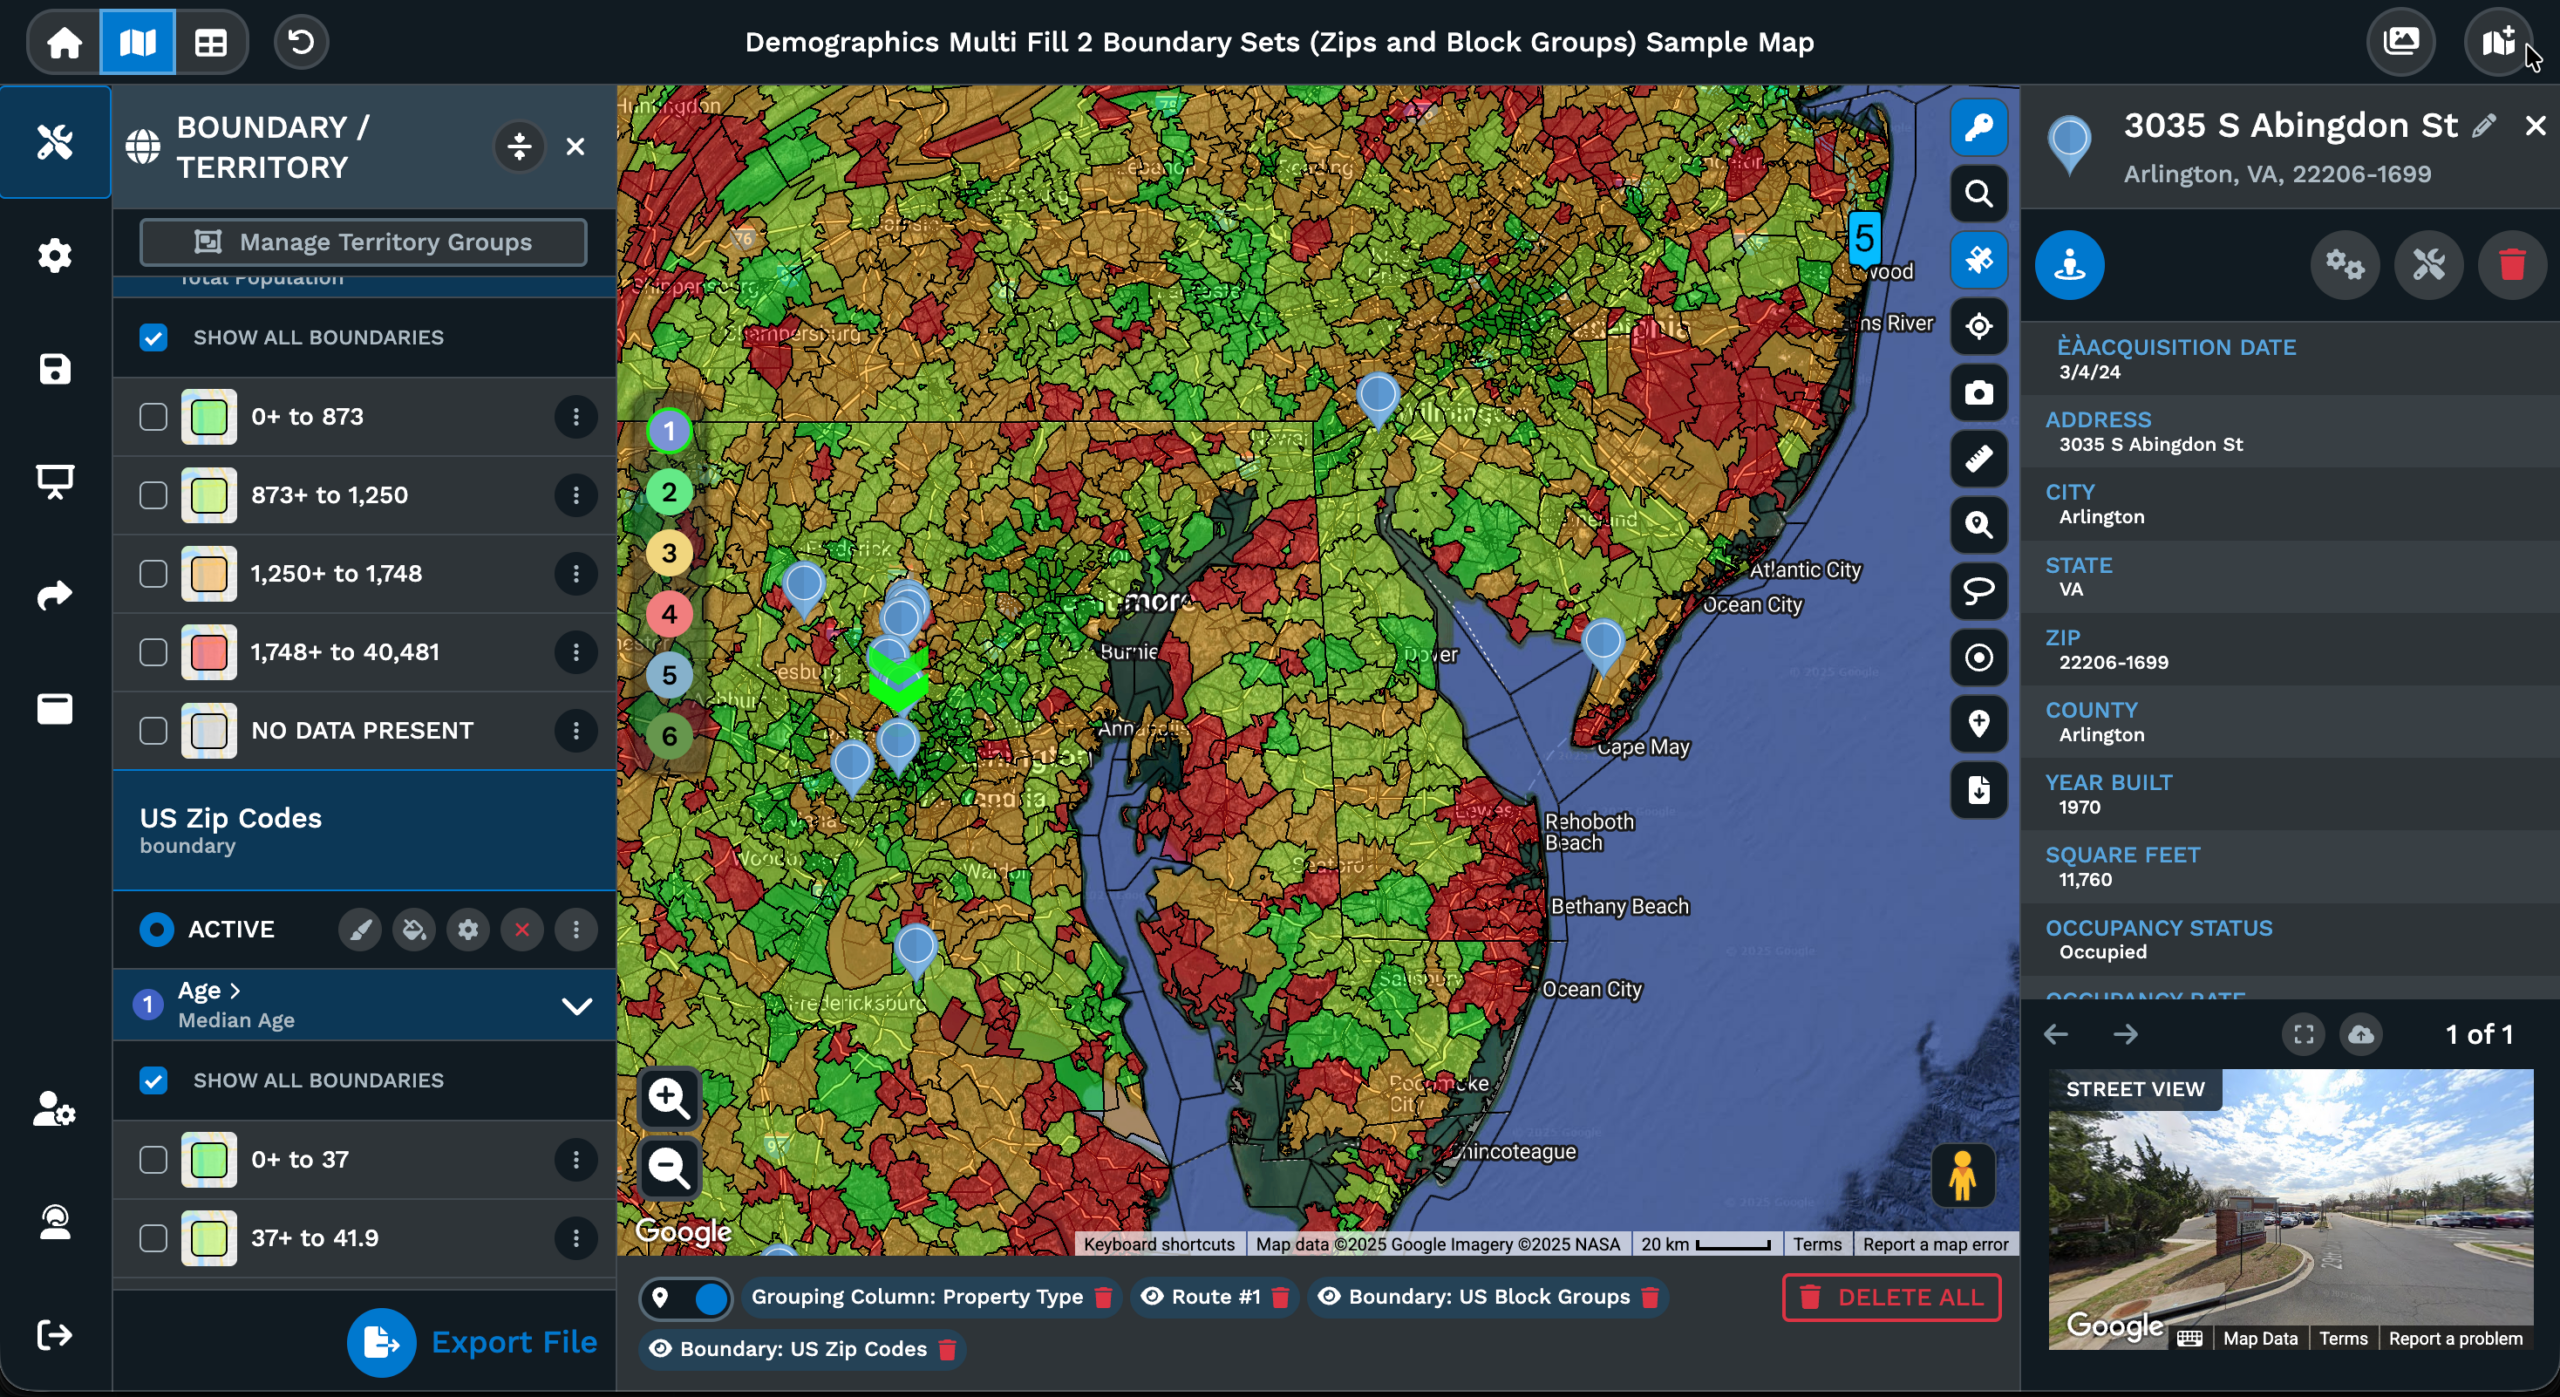
Email Navigation Link to Mobile: the Address Key and the Location Finder send a directions link to a phone so the driver opens directions in the app of choice on arrival
Get Directions output: the Routing tool draws the line on the map and lists every stop in order on the panel below, with sequence handles for drag-and-drop reordering
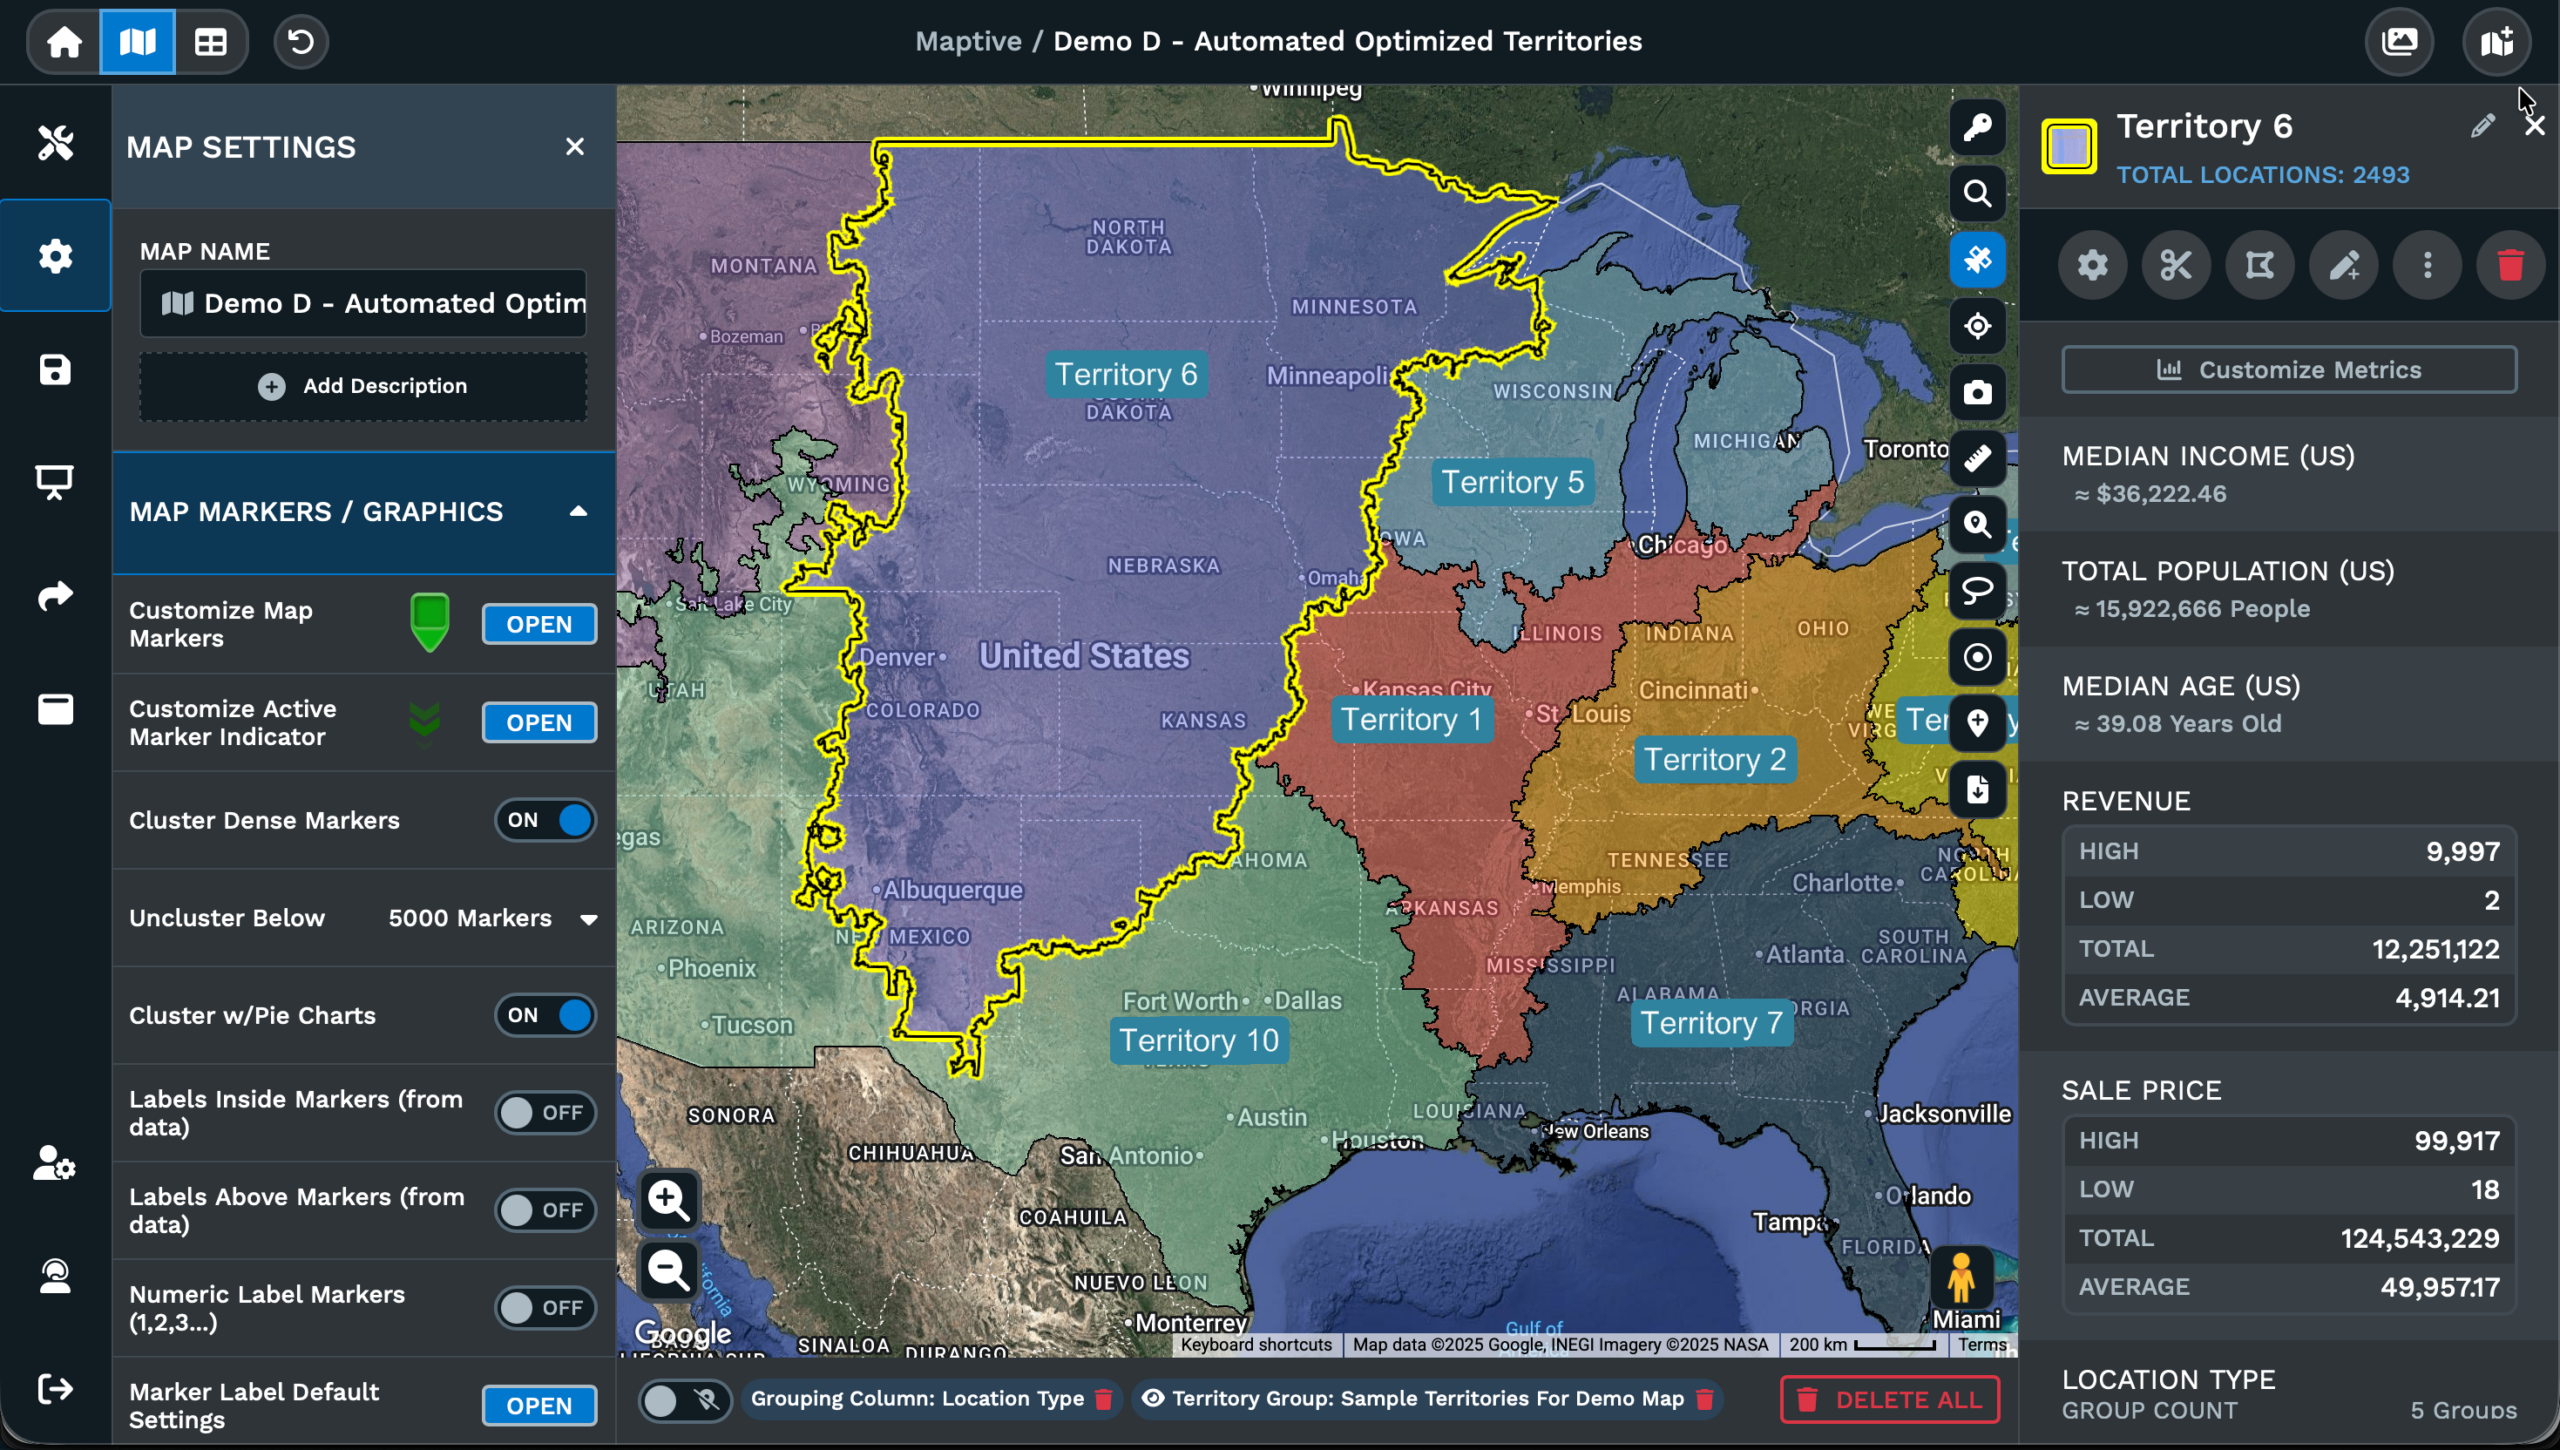
Optimize Route output: the Routing tool returns the most efficient order for multiple locations on the route, keeping the first and last stops fixed where you set them
Export to file: the route exports to a spreadsheet with stop number, approximate driving distance, and approximate travel time per leg, plus a route name column for routes
Multiple route instances: Clear Form and Add another directions instance keep the first route on the map and place a second route alongside it in a separate route color
Get Directions in 3 Steps
1
Tap
Tap a location pin on the phone in Maptive to open the marker info popup window with all the available action buttons.
2
Click
Click Open in Google Navigate inside the popup window, then click Open when the phone prompts to confirm the handoff.
3
Drive
Live turn-by-turn driving directions load in the Google app on the phone and the driver keeps going on the next stop.
Handoff to Google Navigate
1-Tap Drive Start
Optimized Order on Phone
Email Link to Driver
Distance and Time Backup
2 Routes Per Map
Driver Directions From Map to Phone
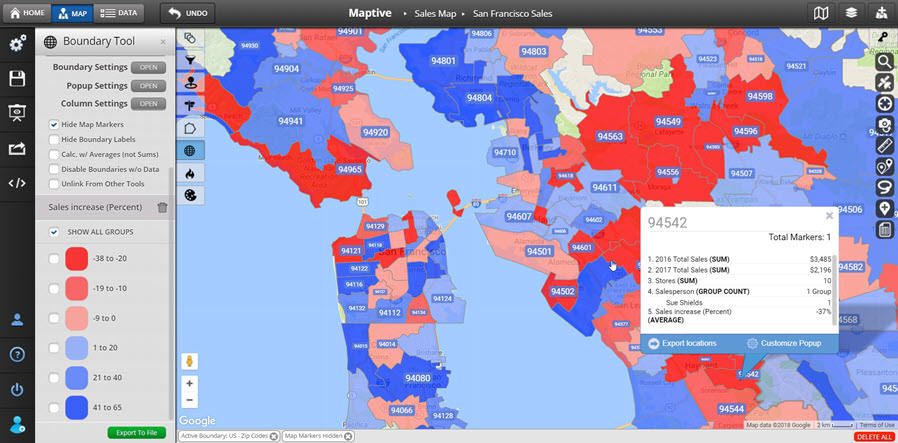
Driving Directions Per Stop
A pin on a Maptive map carries more than coordinates once directions enter the picture. The Open in Google Navigate button on the marker popup sends the address into the Google app on the phone, where live turn-by-turn driving directions take over and follow the route through traffic on the road network. The marker info popup window carries the same button on iPhone and Android phones, so a single workflow covers a mixed fleet.
Directions per stop also work from the Address Key on the desktop side of the product. Click into the Address Key, pick a location, click Email Navigation Link to Mobile, fill out the form, and the link arrives at the phone of the driver in a moment. The Location Finder runs the same flow after a FIND NOW query returns nearby addresses for any field location on the map.
Marker level directions skip the route build when the trip is a single drop on a map. Pick the pin on the map, tap Open in Google Navigate on the phone, accept the prompt, and live driving directions load in the Google app on the device. The address on the map and the address on the phone match every time, since Maptive sends the pin coordinates rather than a retyped string for each stop on the road.
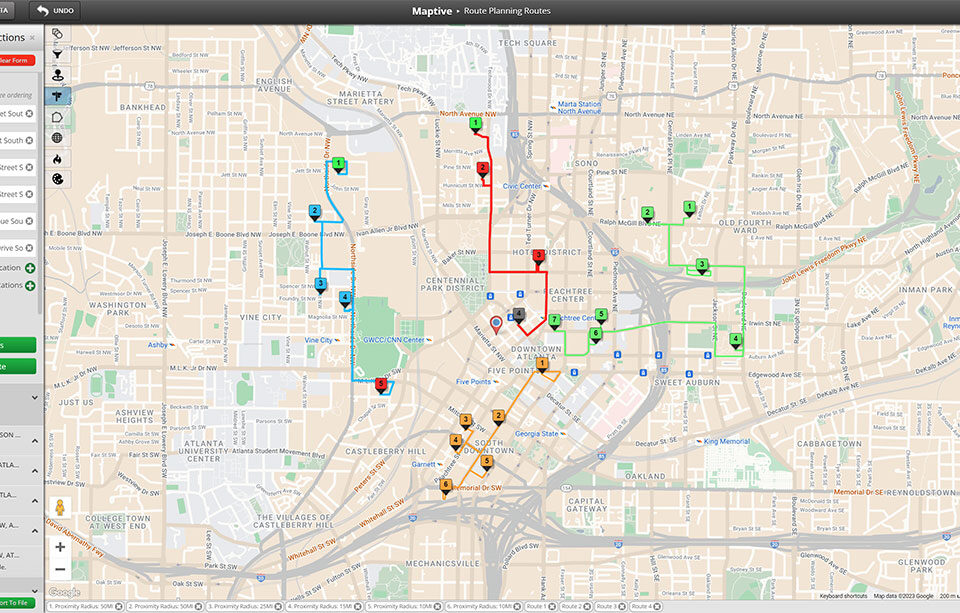
Routes Sent to Phones
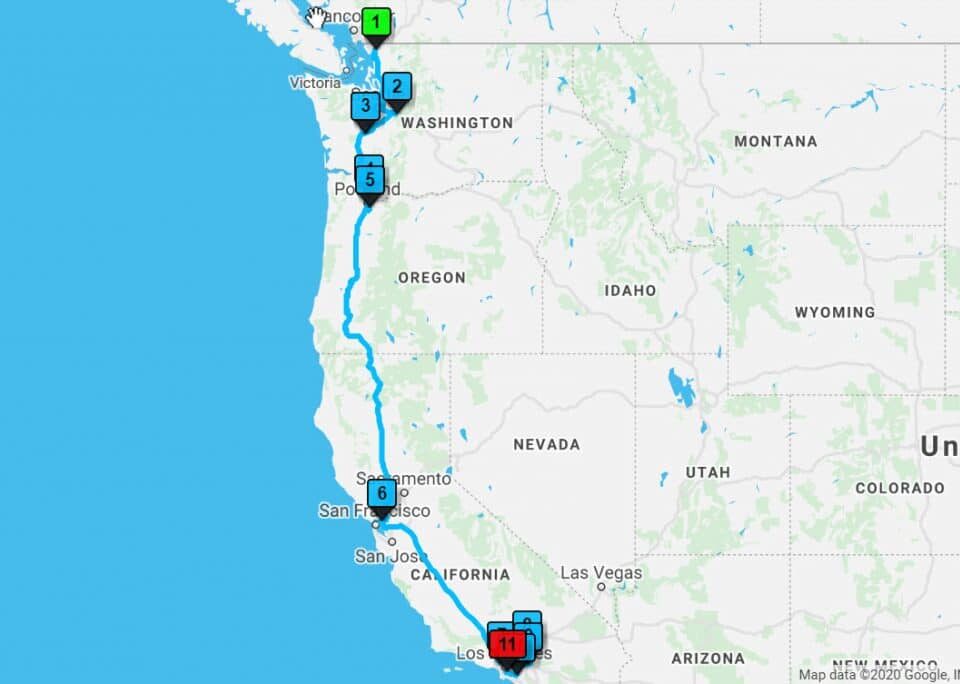
A full route lives in the Routing tool until the driver gets on the road and needs the order on a phone. Add markers with Add to Route or Lasso and Fill Locations until the stop list grows to the size you need, click Get Directions to draw the line, or click Optimize Route for the most efficient order between start and end stops. The route appears on the map and the stop list appears on the panel below the map.
Stops on the phone come from the per-marker handoff once the route sits on the map. Open a pin from the map on the phone, tap Open in Google Navigate, and live turn-by-turn driving directions load in the Google app for that stop. Drag and drop the order using stacked equal sign handles on the panel before the driver leaves, and the route on the phone matches the route on the desktop screen.
2 routes can sit on the same map for 2 crews or 2 zones in a single area on the plan. Click Clear Form, build the next route with Add to Route, then click Add another directions instance when prompted, and the second route sits on the map in a separate color from the first route. Edit the route color or route name from the Settings icon on each route, and every driver works against a labeled trip.
Stop Lists for Drivers
A driver in the cab wants the stop list on paper or on a screen the moment the day starts, with the order set the night before. The Routing panel shows stops in order inside Maptive, then Export to file returns a spreadsheet carrying stop number, approximate driving distance, and approximate travel time per leg of the route. The export sits in the file the dispatcher keeps on the desktop, and values line up with the order on the map.
A printable backup helps when the phone goes flat or signal drops on a long rural drive between stops. Print the spreadsheet from the file and the driver carries a stop list with stop number, distance, and time per leg. The list runs in the same order as the Routing panel, so the print and the map agree on the sequence of stops for the trip on the road that day.
2 routes export with a route name column so the print pages stay sorted for each driver in a fleet. Build each route in Maptive, edit the route name from the Settings icon and Edit Route, then export every route to file for the dispatcher pile of papers. Each crew gets a labeled stop list, the driver works the right route, and the office keeps a record that matches the trip on the road for review.
FAQs About Turn-by-Turn Directions
How do I get turn-by-turn directions in Maptive?
Open Maptive on the phone, tap the location pin on the map to open the marker info popup window, then tap Open in Google Navigate. Confirm the prompt to open the Google app on the phone and live turn-by-turn driving directions load against the address pinned on the map. The same button shows up inside the Address Key on the phone, so any location in the list of map markers reaches the Google app the same way without a route build in between.
Can I send a route from my computer to Google Maps?
From the desktop in Maptive, click into the Address Key or the Location Finder, pick a location, then click Email Navigation Link to Mobile. Fill out the form with the destination phone email address and click send, and the directions link arrives at the phone for the driver. Tapping the link opens the Google app on the phone with live turn-by-turn driving directions to the pinned address on the map, so the desktop plan reaches the road on the device the driver opens.
How do I share a route with a driver in the field?
Build the route in the Routing tool with Add to Route or Lasso and Fill Locations, then click Get Directions or Optimize Route to set the order on the map. Use Email Navigation Link to Mobile from the Address Key on each stop so the driver gets per-location links on the phone in the cab. Click Export to file to send the spreadsheet of stops, approximate driving distance, and approximate travel time per leg to the driver email for an extra copy of the run.
What is the best navigation app for delivery drivers?
Maptive sends directions to the Google app on the phone through the Open in Google Navigate button on the marker popup and the Email Navigation Link to Mobile flow on the desktop. Both paths drop the address into the Google app loaded on the device, which carries live traffic data on the road. The Maptive routing tool plans the order of stops on the map and the Google app drives the leg between 2 stops on the phone of the driver.
How do I get directions for multiple stops on 1 trip?
Click a marker on the map, click the tools icon, click Add to Route, and repeat the flow for each stop on the trip. Or click Lasso and Fill Locations to add a set of pins together by drawing a polygon on the map. Click Get Directions to draw the route, or click Optimize Route to return the most efficient order between the start and end pins. The Routing tool supports multiple stops on a single route on a map.
Can I print driving directions from Maptive?
The Routing tool shows the stop order on the map and on the Routing panel inside the product on the desktop. Click Export to file and the route exports to a spreadsheet with stop number, approximate driving distance, and approximate travel time per leg of the route. Print the spreadsheet from the desktop and the driver carries the stop list in the cab. The printout sticks with the run when the phone goes flat or signal drops on a long stretch of rural road.
How do I add stops to a route in Maptive?
Click a marker on the map, click the tools icon, then click Add to Route, and the location drops in as the next entry on the Routing panel. Repeat the same flow per stop until the panel has every pin for the trip on the map. Or click Lasso and Fill Locations to add every pin inside a drawn polygon together. Drag and drop the order using the stacked equal sign handles on the panel before clicking Get Directions on the route.
Does Maptive optimize the order of stops on a route?
Click Optimize Route on the Routing panel and the tool returns the most efficient order between the stops on the route in Maptive on the map. The start and end stops stay where you set them, so the route can begin and end at the office, the warehouse, or the driver home address. The optimized run shows on the map and the order shows on the Routing panel below the map. Optimize Route runs against multiple stops on a route.
Is there an export for stop distance and time?
Click Export to file on the Routing tool and the route exports to a spreadsheet. The spreadsheet carries a column for the stop number, a column for the approximate driving distance, and a column for the approximate travel time per leg of the route on the map. The travel time uses the speed limit on each road and does not factor traffic or weather. The export also carries a route name column so several routes stay labeled on a single file.
Can I keep 2 routes on the same map for 2 drivers?
Build the first route with Add to Route and click Get Directions or Optimize Route to set the order on the map. Click Clear Form on the Routing panel, add the next set of stops, and click Add another directions instance when prompted. The second route appears on the map in a separate color from the first route on the map. Edit the route color and route name from the Settings icon on each route, and each driver works the labeled run.