How to Map Multiple Locations with Google Maps
Did you know that Google Maps lets you pin multiple locations at the same time? Creating customized maps is one of the lesser-known functionalities of the beloved app, and it’s incredibly easy and fun to use.
Google Maps is the most popular navigation app, and for good reason. The amount of data it sources from businesses, websites, and users, as well as the attention to detail and accuracy, make it incredibly reliable and easy to use.
Why Should You Pin Multiple Locations with Google Maps?
If you’ve ever found yourself planning a trip with multiple destinations, you know that it can become very time-consuming to try to visualize all the different places you need to visit in one quick snapshot.
Vacations are a great use case for this functionality, but if you manage a sales team who visits clients regularly, creating Google Maps with pins for multiple locations can also come in handy.
In this article, we will go over how to plot multiple locations at the same time using Google Maps, and we will also introduce and explain some of the other tools available to help you do more with a new map.
What You’ll Need
- A computer with an internet connection.
- A Google account.
- A list of locations in a spreadsheet document (Excel XLS, CSV File, Google Sheets). It can be as simple as a list of multiple addresses or as detailed as latitude and longitude data. The order of the columns does not matter, but your spreadsheet should contain at least two columns of data.
Getting Started
First, let’s get your addresses or location data uploaded into Google Maps:
- Go to maps.google.com in your web browser and sign in with your Google account.
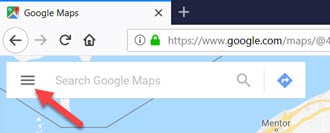
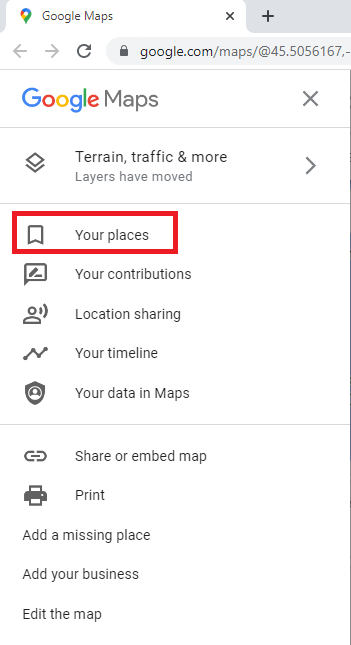
- Click on the menu icon in the top left corner of the screen and select “Your places.”
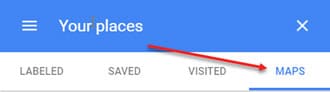
- Click on the “Maps” tab and then click on the “Create Map” button at the bottom of the menu.
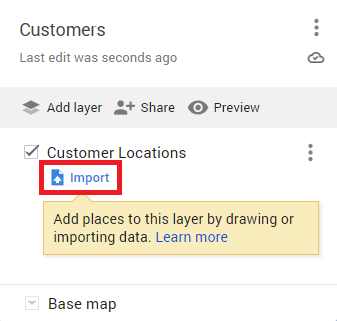
- Give your map a name and description by clicking on “Untitled Map”. Click on the “Add Layer” button to create a new layer for your data or use the default layer.

- Click on the “import” button in the new layer by clicking on the three vertical dots button to open the layer options menu.
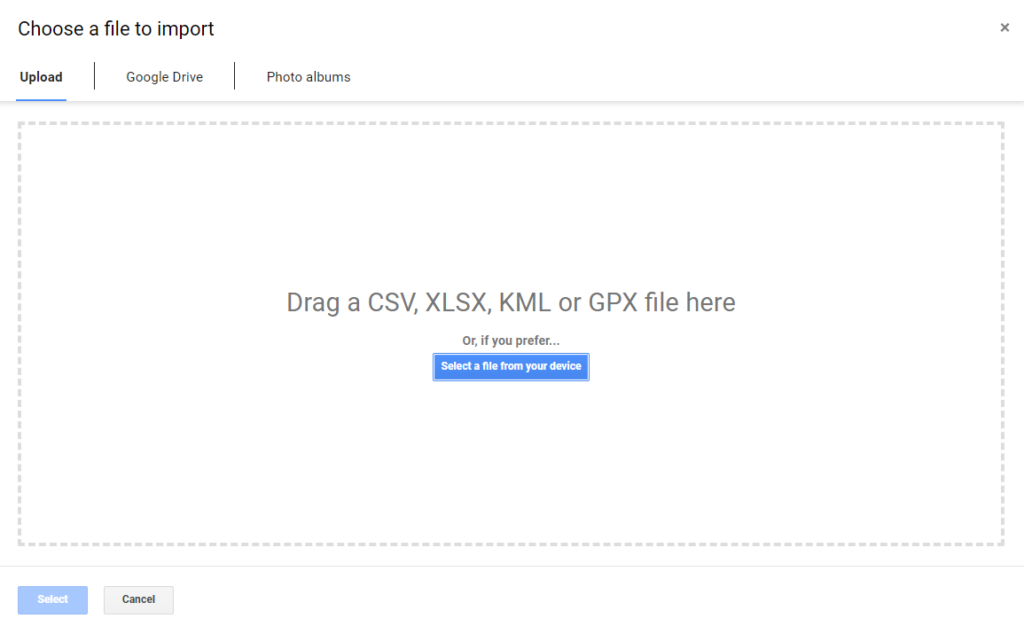
- Select the file that contains your spreadsheet data, then click on the “Open” button on the next screen.
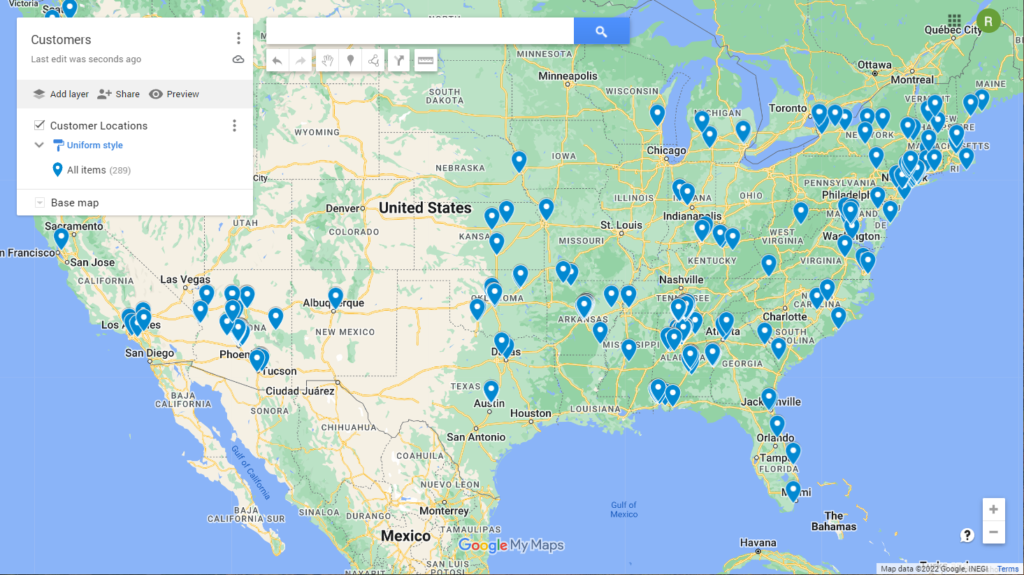
- Google Maps will plot all of your document’s locations onto the map.
Congratulations! You have just learned how to map multiple locations!
Customizing Your Google Map
Once all your locations appear on the map, you can get creative and use different tools to make your map style one-of-a-kind, with customized markers, different pin colors, and a variety of other features. Here are a few of our favorites.
Adding Markers
If you want to add a marker to your map, simply click on the “Add Marker” button and then click on the location where you want it. You can also select the marker color for an extra unique touch.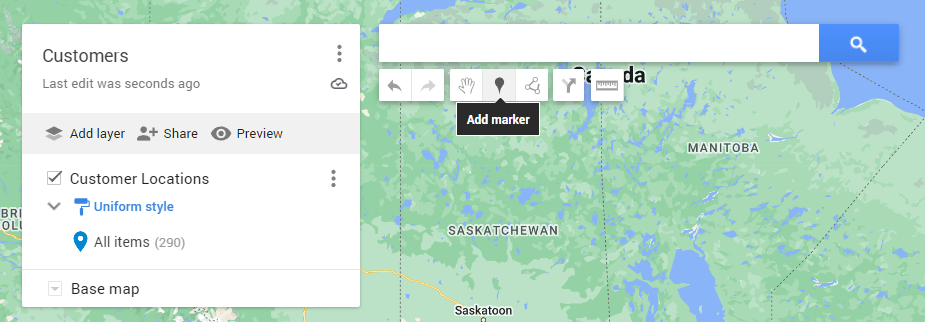
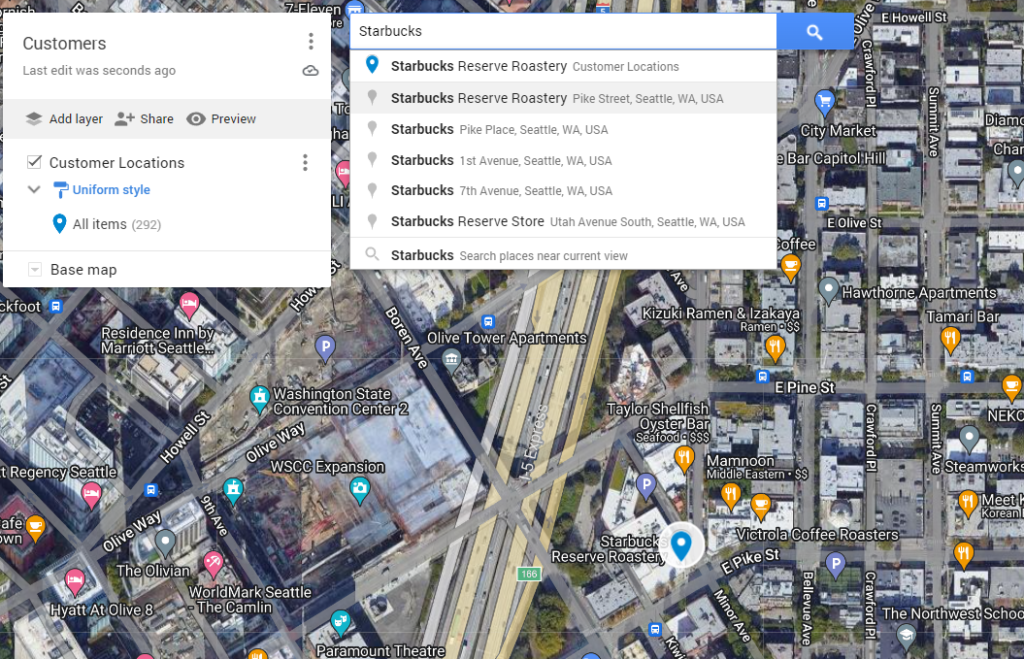
Adding Points of Interest
If you want to easily add points of interest to your maps–such as restaurant, business, hotels, etc – simple search for the location in the google maps search bar and select the location you want from the results that pop down. This will bring you to the location and you will have the option to add the location as a marker on your map.
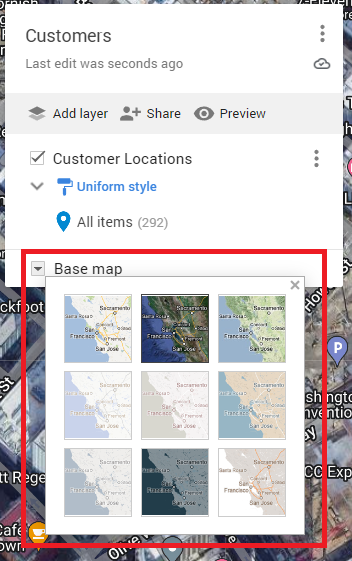
Choosing a Custom Google Map Style
You can change the way your map looks by clicking on the “Base Map” button. This will bring up a menu where you can decide the map style that makes the most sense for your custom map. If you want to go back to the default map style, simply click on the “Reset to default” button.
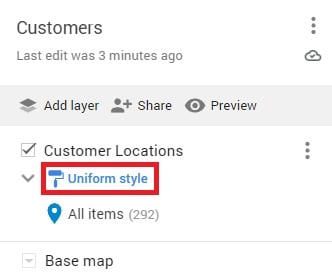
Changing the Color and Style of Your Pins
If you want to change the color and style of the pins on your custom map, simply click on the “Uniform Style” button and choose from one of the other styling options available. Here, you can also group markers by numerical value or by a common data attribute such as city, state, county, salesperson, or any other value in your data.
Searching Through Your Markers
Google Maps comes with a built-in search function that you can use to look for a location’s name, category, or any other label you have created. Simply use the main search bar to search for the name of your location, address, or other data attribute to find the marker you are looking for.

Navigating Between Markers
By clicking on any of the markers on your Google map you can select the “Directions to Here” icon to start creating a route. Click on another marker icon, and the system will generate a route between the two markers. You can also click on the “Add Directions” button at the top of Google Maps to create your own custom directions.
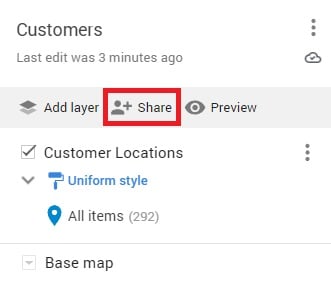
Sharing and Embedding Your Map
Once you’re happy with your map, you can also very easily share it with others by clicking on the “+ Share” button. If you’d like to add your custom map to a website or blog, click on the “Embed” button and, to the left of the text box, pick the size you want by clicking the Down arrow. You can then copy the text in the box and paste it into the HTML of your website or blog.
Additional Tips
- If your spreadsheet contains latitude and longitude coordinates, make sure to select the “Latitude/Longitude” option when prompted to choose a location column.
- A Google map will only plot locations that are entered as addresses or latitude and longitude coordinates. If your spreadsheet contains other data, such as place names or business names, you’ll need to enter that data into separate columns.
- You can add multiple layers to your map, which can be useful if you want to plot different types of data on a single map. For example, you could create one layer for addresses and another layer for latitude and longitude coordinates.
- When adding pins, make sure to specify the address, city, and country for each location. You can also add notes to each pin by clicking on the pencil icon next to the pin’s name. This is a good place to add a marker description.
How to Customize Your Google Maps Further
The above are all great ways to map multiple locations and create a unique way to visualize excel data. However, if you are looking for more advanced options then what Google maps offers, you’ll need to go a step further yet.
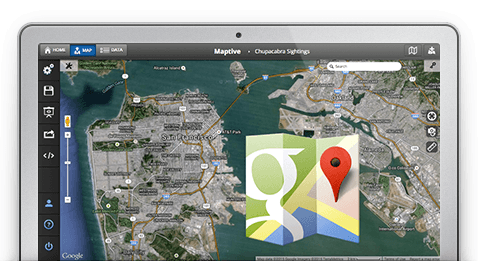
Maptive
Maptive is a cloud-based mapping software that is very easy to use and allows you to create unique maps with much more customization options than what Google Maps offers.
More importantly, Maptive has a full suite of features and tools that can go much further than plotting locations. It can help you gain actionable insights into sales, marketing, and business operations. Maptive tools & features include territory building, marker grouping, filtering tools, mapping by a geographic boundary (such as zip code, city or state), drive time and distance maps, heat maps, multi-stop route planning, and more.
On top of that, Maptive also gives you much more control over user permissions for viewing and sharing, making it the ideal mapping software for businesses looking to get more insights from their location data.
If you are looking for a good all-around mapping solution with great customer support, you can try Maptive for free by signup up for a trial account.
Quick Recap
Mapping out multiple locations can be daunting, but with the help of Google Maps, it can be easy and straightforward.
By following a few simple tips, you can create unique maps that are tailored to your specific needs, whether you are planning a road trip, scoping out your next business location, creating territories for your sales team, or planning a targeted marketing campaign.
And if you need more customization options than what is available in Google Maps, there are a number of different mapping software solutions out there to cater to your needs.
Looking to try out Maptive? Sign up for a free 10-day trial.
Start Your Free, No Risk, 10 Day Trial
No credit card required. No surprises. Just Results.
START MAPPING NOW